Invoice Detail & Line Items
What this is for
The invoice detail page shows everything about one generated invoice — who it's for, the period it covers, each day's line item, the totals, and the buttons to download it as a PDF or change its status.
You open the detail page by clicking View Full on the preview panel, or by clicking an already-generated invoice in the list.
Steps
Read the header
At the top of the page you will see:
- The invoice number.
- The status badge (Draft, Finalized, Exported, Archived — see Invoice Statuses).
- The period it covers.
- The company abbreviation.
Below that, a two-column card shows:
- Bill To — the company name and short code.
- Details — period, entity (company), employee, team, classification, and source mode.
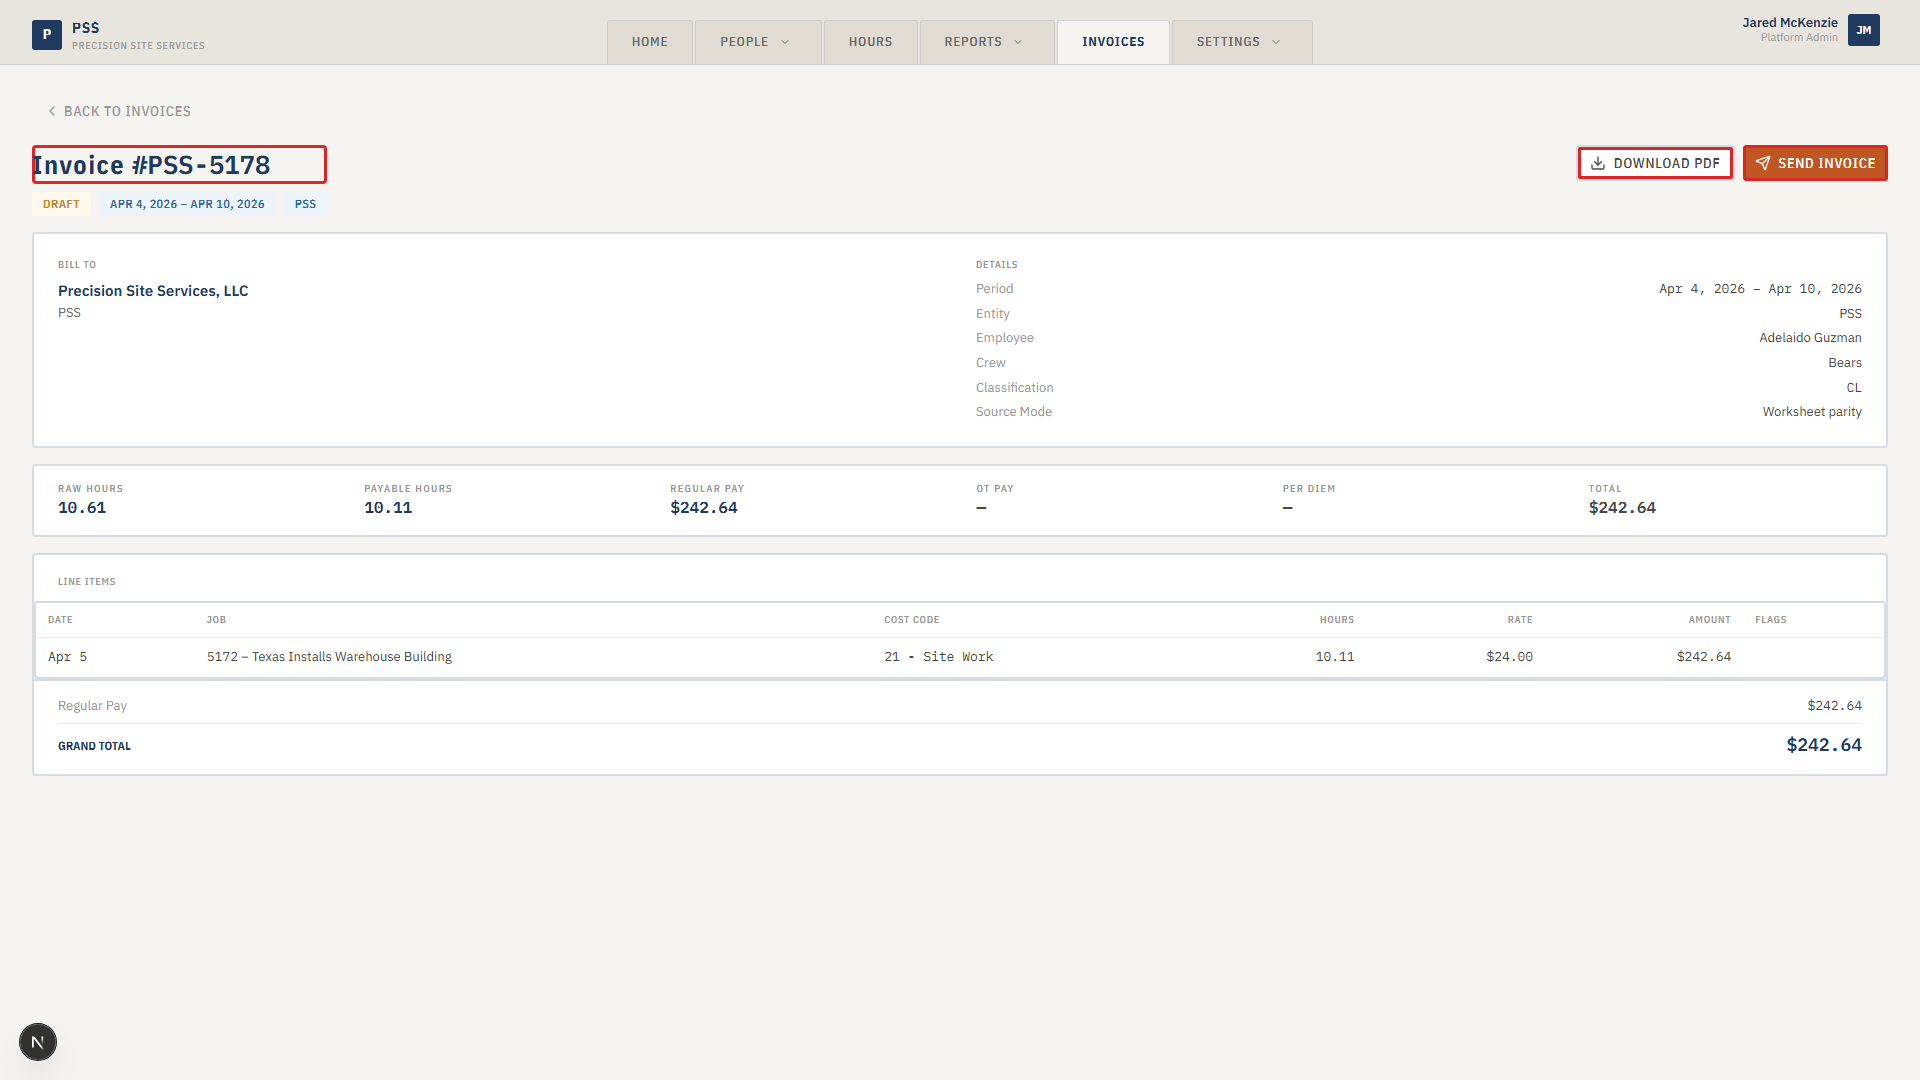
Read the line items
Each line item is one day's work:
- Date — the work day.
- Job — the job number and name.
- Cost Code — the cost code, if one is assigned.
- Hours — hours worked that day.
- Rate — the hourly rate applied.
- Amount — hours × rate.
- Flags — small tags like OT (overtime), CPR (Certified Payroll), or PD (per diem).
Below the table you will see a breakdown of Regular Pay, Overtime Pay, Per Diem, and a Grand Total.

Download the PDF
- At the top right of the page, click the Download PDF button.
- The PDF opens or downloads in your browser.
- This is the file you send to the customer. It has the company logo, the bill-to block, each line item, and the total.
![]()
Change the status
- As the invoice moves through your process — finalized, exported to accounting, archived — change its status so others on your team can see where it is.
- You can also use Send Invoice once the PDF is ready to go to the customer.
- See Invoice Statuses for what each status means.
Invoice status badge.
This screenshot will be added in a future docs update once the underlying state is reproducible in dev.
Edit a line item
Line items are built from time records, so the best way to fix a bad line item is to fix the underlying time record.
- Note the date and the bad value on the line item.
- Go to the Hours tab, find the record, and submit a Time Correction.
- Once the correction is approved and synced, delete the old invoice from the invoice list and regenerate it.
Common mistakes
- Editing the PDF by hand. Always fix the data, not the PDF, so the next regeneration is correct.
- Downloading a Draft invoice and sending it to the customer. Always change the status to Finalized first so your team knows it is ready to go.
- Forgetting to mark an invoice as Exported after you push it to the accounting system. Other users will think it still needs to be exported.
What to do if it goes wrong
- If the Download PDF button fails, refresh the page and try again. The PDF is built on demand.
- If the bill-to or logo is wrong, the company record is out of date. Have an admin fix it in Settings → Companies, then regenerate the invoice.
- If a line item is missing, the underlying time record was probably not included in the period. Check the date range on the record.
- If the total doesn't match what you expect, scan the Flags column. An unexpected OT or PD tag usually explains the difference.