Access & Roles
What this is for
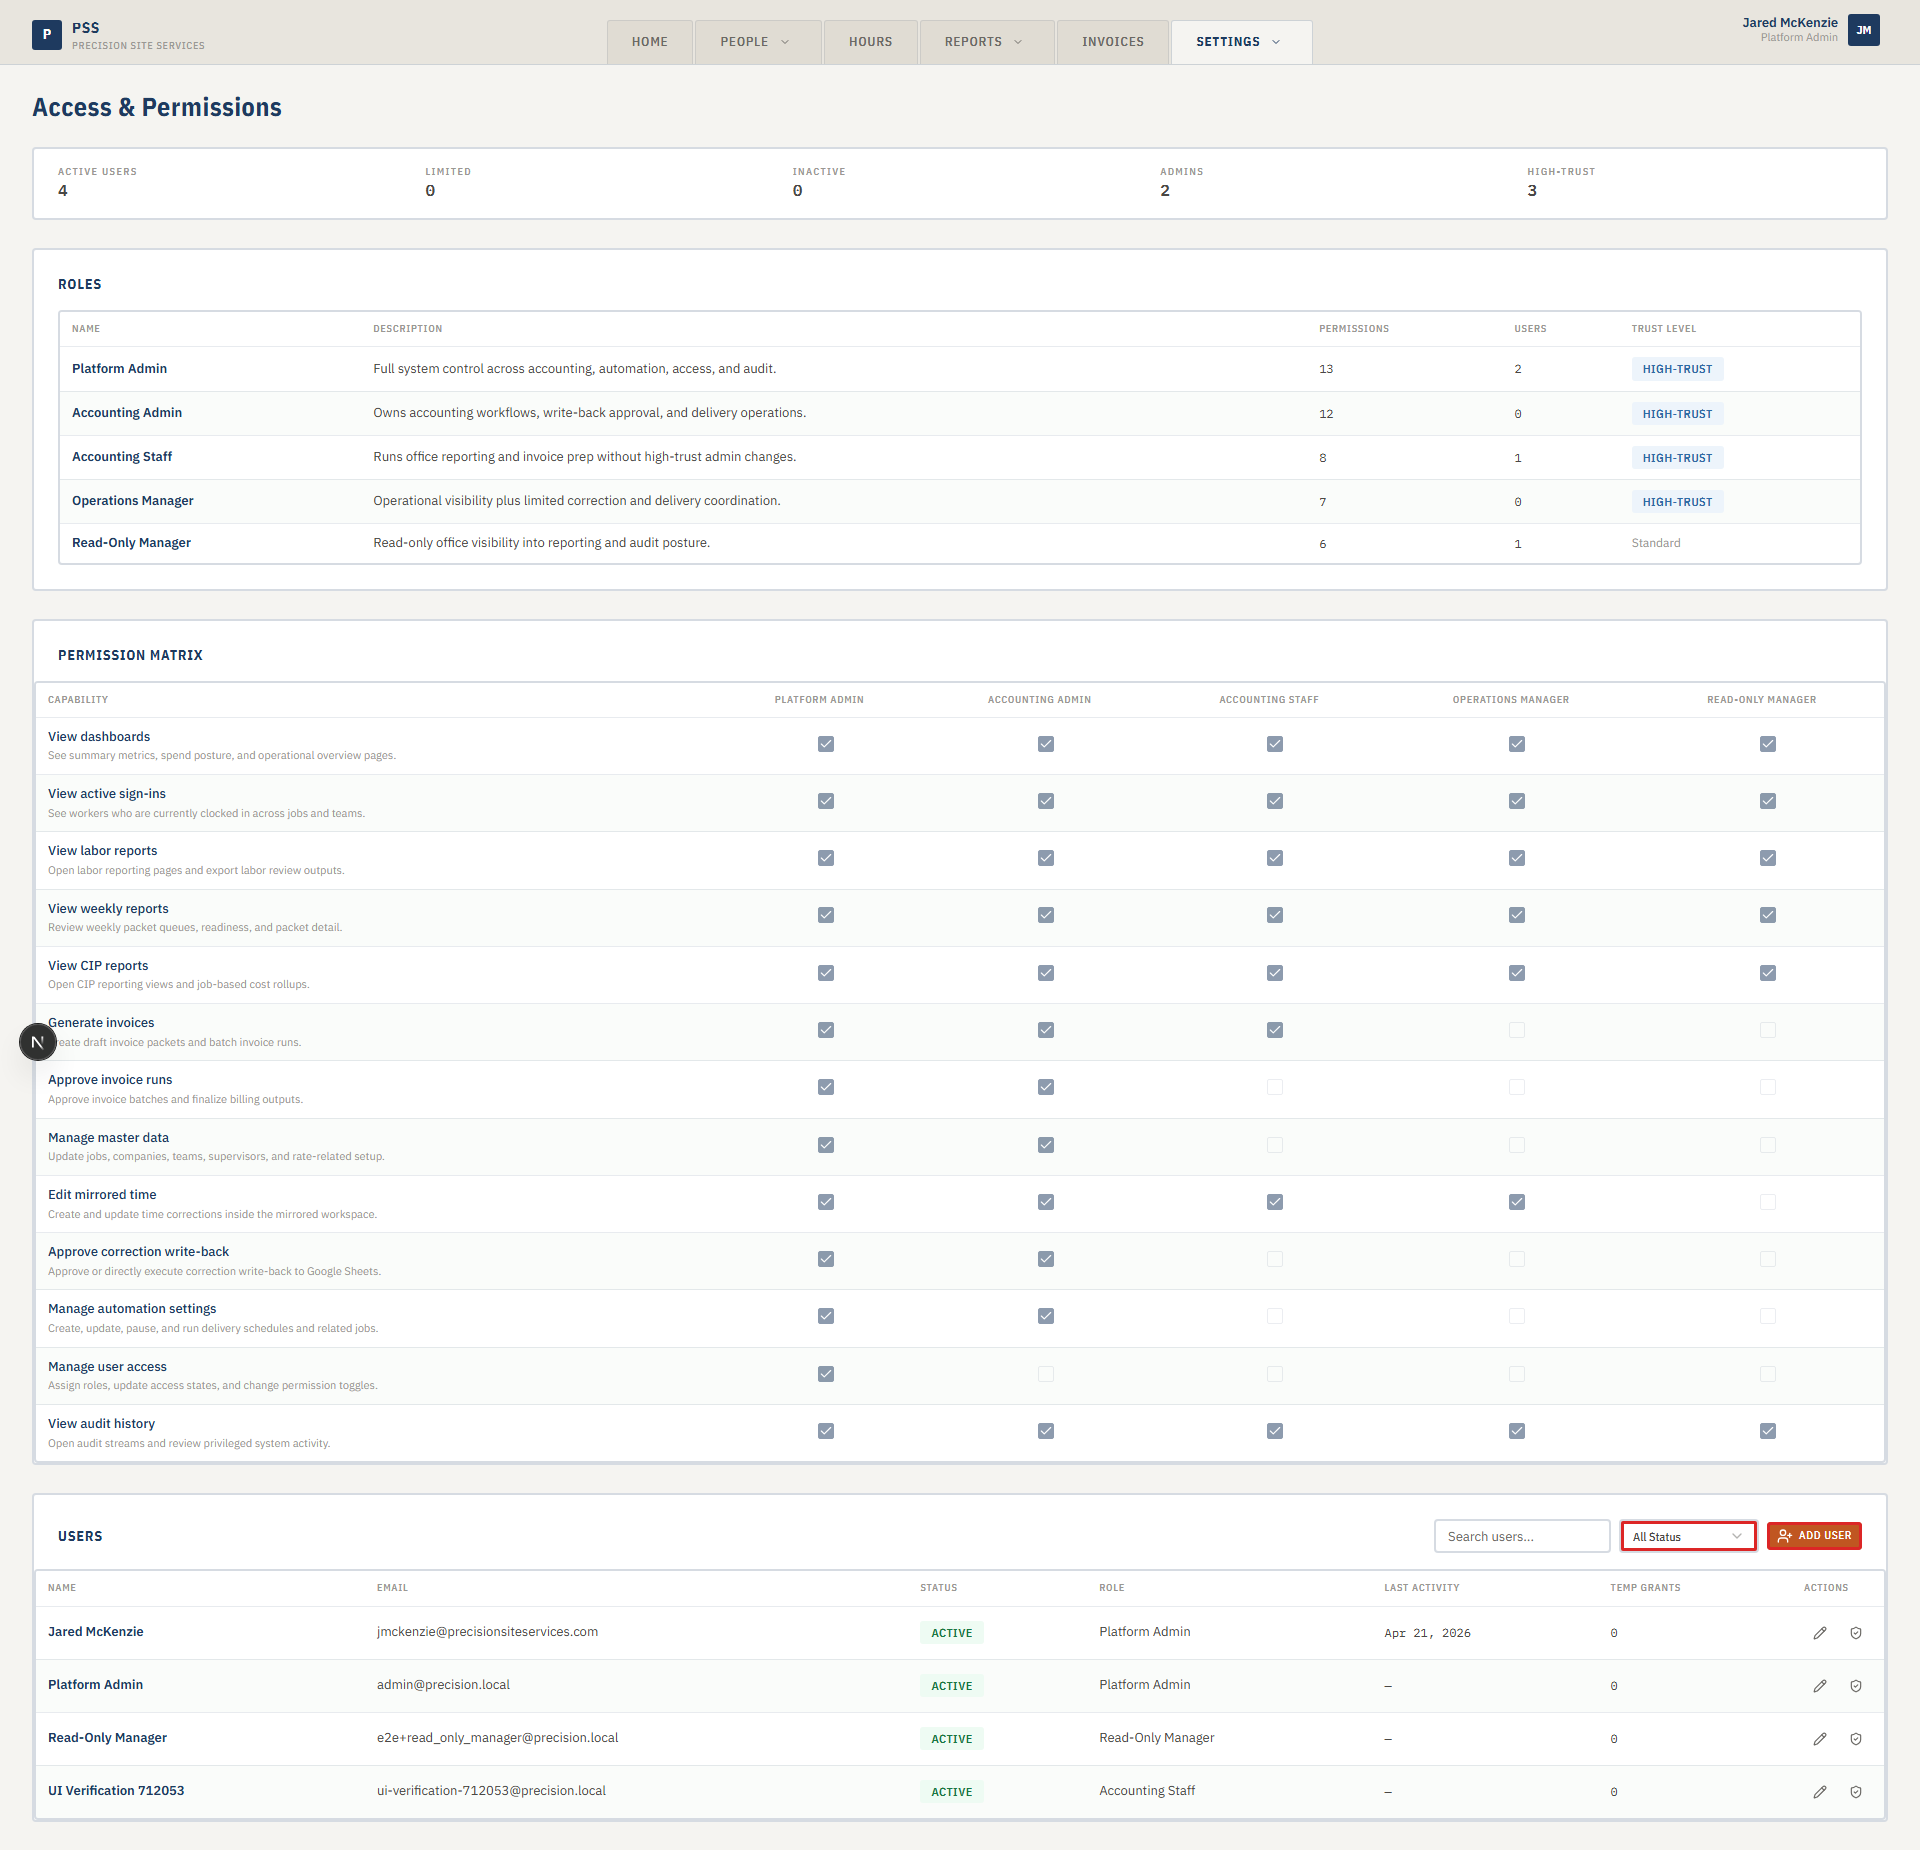
The User Access page is where administrators control who can log in to the app and what each person is allowed to do. Every office staff member who uses this app needs an entry here with an active status and a role assigned.
Users log in with their @precisionsiteservices.com Google Workspace account. This page does not set passwords — it controls whether a Google account is allowed in and what that account can do once it signs in.
The page has three sections: Roles (the named permission sets), Permission Matrix (which capabilities each role has), and Users (the individual accounts).
Steps
Adding a new user
-
Click the Settings tab at the top of the screen.
-
Choose User Access from the dropdown.
-
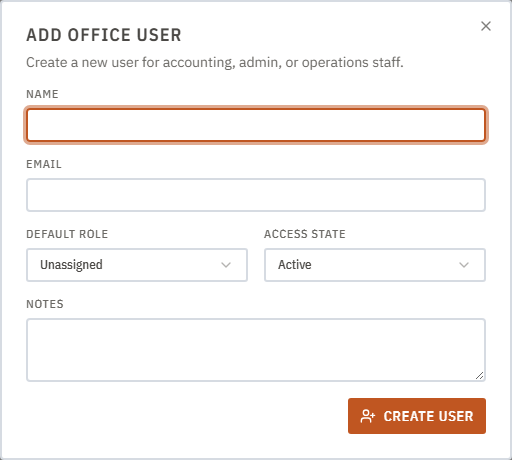
Click Add User in the top right of the Users card.
-
Fill in the Add Office User form:
- Name — the person's full name as it will appear in the app.
- Email — their full
@precisionsiteservices.comGoogle address. This must match exactly what they use to sign in with Google. - Default Role ��— choose their role from the list (see role descriptions below).
- Access State — set to Active so they can sign in immediately. Use Limited to grant restricted access. Use Inactive to block sign-in.
- Notes — optional. Use this to note why the account was created or any special context.
-
Click Create User. The account appears in the Users table.
Understanding roles
The Roles card at the top of the page lists all available roles. Click a role row to see its full permission list. The Permission Matrix card shows a cross-reference of every capability versus every role.
Common roles include:
- Accounting — access to reports, invoices, and time data. Standard trust level.
- Operations — access to field worker and job management. Standard trust level.
- Admin — full access to all pages including Settings. High-trust level.
Editing a user
- Find the user in the Users table. Use the search box or the Status filter to narrow the list.
- Click the pencil icon on their row to open the edit dialog.
- Change their role, access state, or notes as needed.
- Click Save Changes.
Granting a temporary permission
Sometimes a user needs access to one capability outside their normal role — for example, a payroll clerk who needs to run a one-time delivery.
- Find the user in the Users table.
- Click the shield icon on their row to open the Permission Grant dialog.
- Choose the permission to grant and set an expiry if needed.
- Click Grant. The grant appears in the user's Temp Grants count in the table.
- To revoke a temporary grant, open the user's edit dialog and remove the grant from the list.
Deactivating a user
-
Find the user in the Users table.
-
Click the pencil icon on their row.
-
Change Access State to Inactive.
-
Click Save Changes. The user can no longer sign in.

Common mistakes
- Wrong email address. If the email in this table does not match the Google account the person signs in with, they will see an "Unauthorized" screen. Copy the email address exactly.
- Forgetting to set the role. A user with no role assigned can log in but may not be able to view any pages. Always assign a role when creating a user.
- Deactivating the only admin. If you deactivate the last admin account, no one will be able to manage access. Always keep at least one active admin.
- Granting a temporary permission and forgetting to revoke it. Check the Temp Grants column regularly. Grants without an expiry date stay active indefinitely.
What to do if it goes wrong
- A user sees "Unauthorized" after signing in. Their email is likely not in the Users table, or their access state is set to Inactive. Add or reactivate them.
- A user cannot see a page they should have access to. Check their role in the Users table and compare it to the Permission Matrix to confirm the role includes the needed capability.
- You cannot see the User Access page. Your account needs the Manage User Access permission. Ask another administrator to grant it.
- The Users table is empty. Refresh the page. If it stays empty, check with IT — the user data API may be unavailable.