Audit Log
What this is for
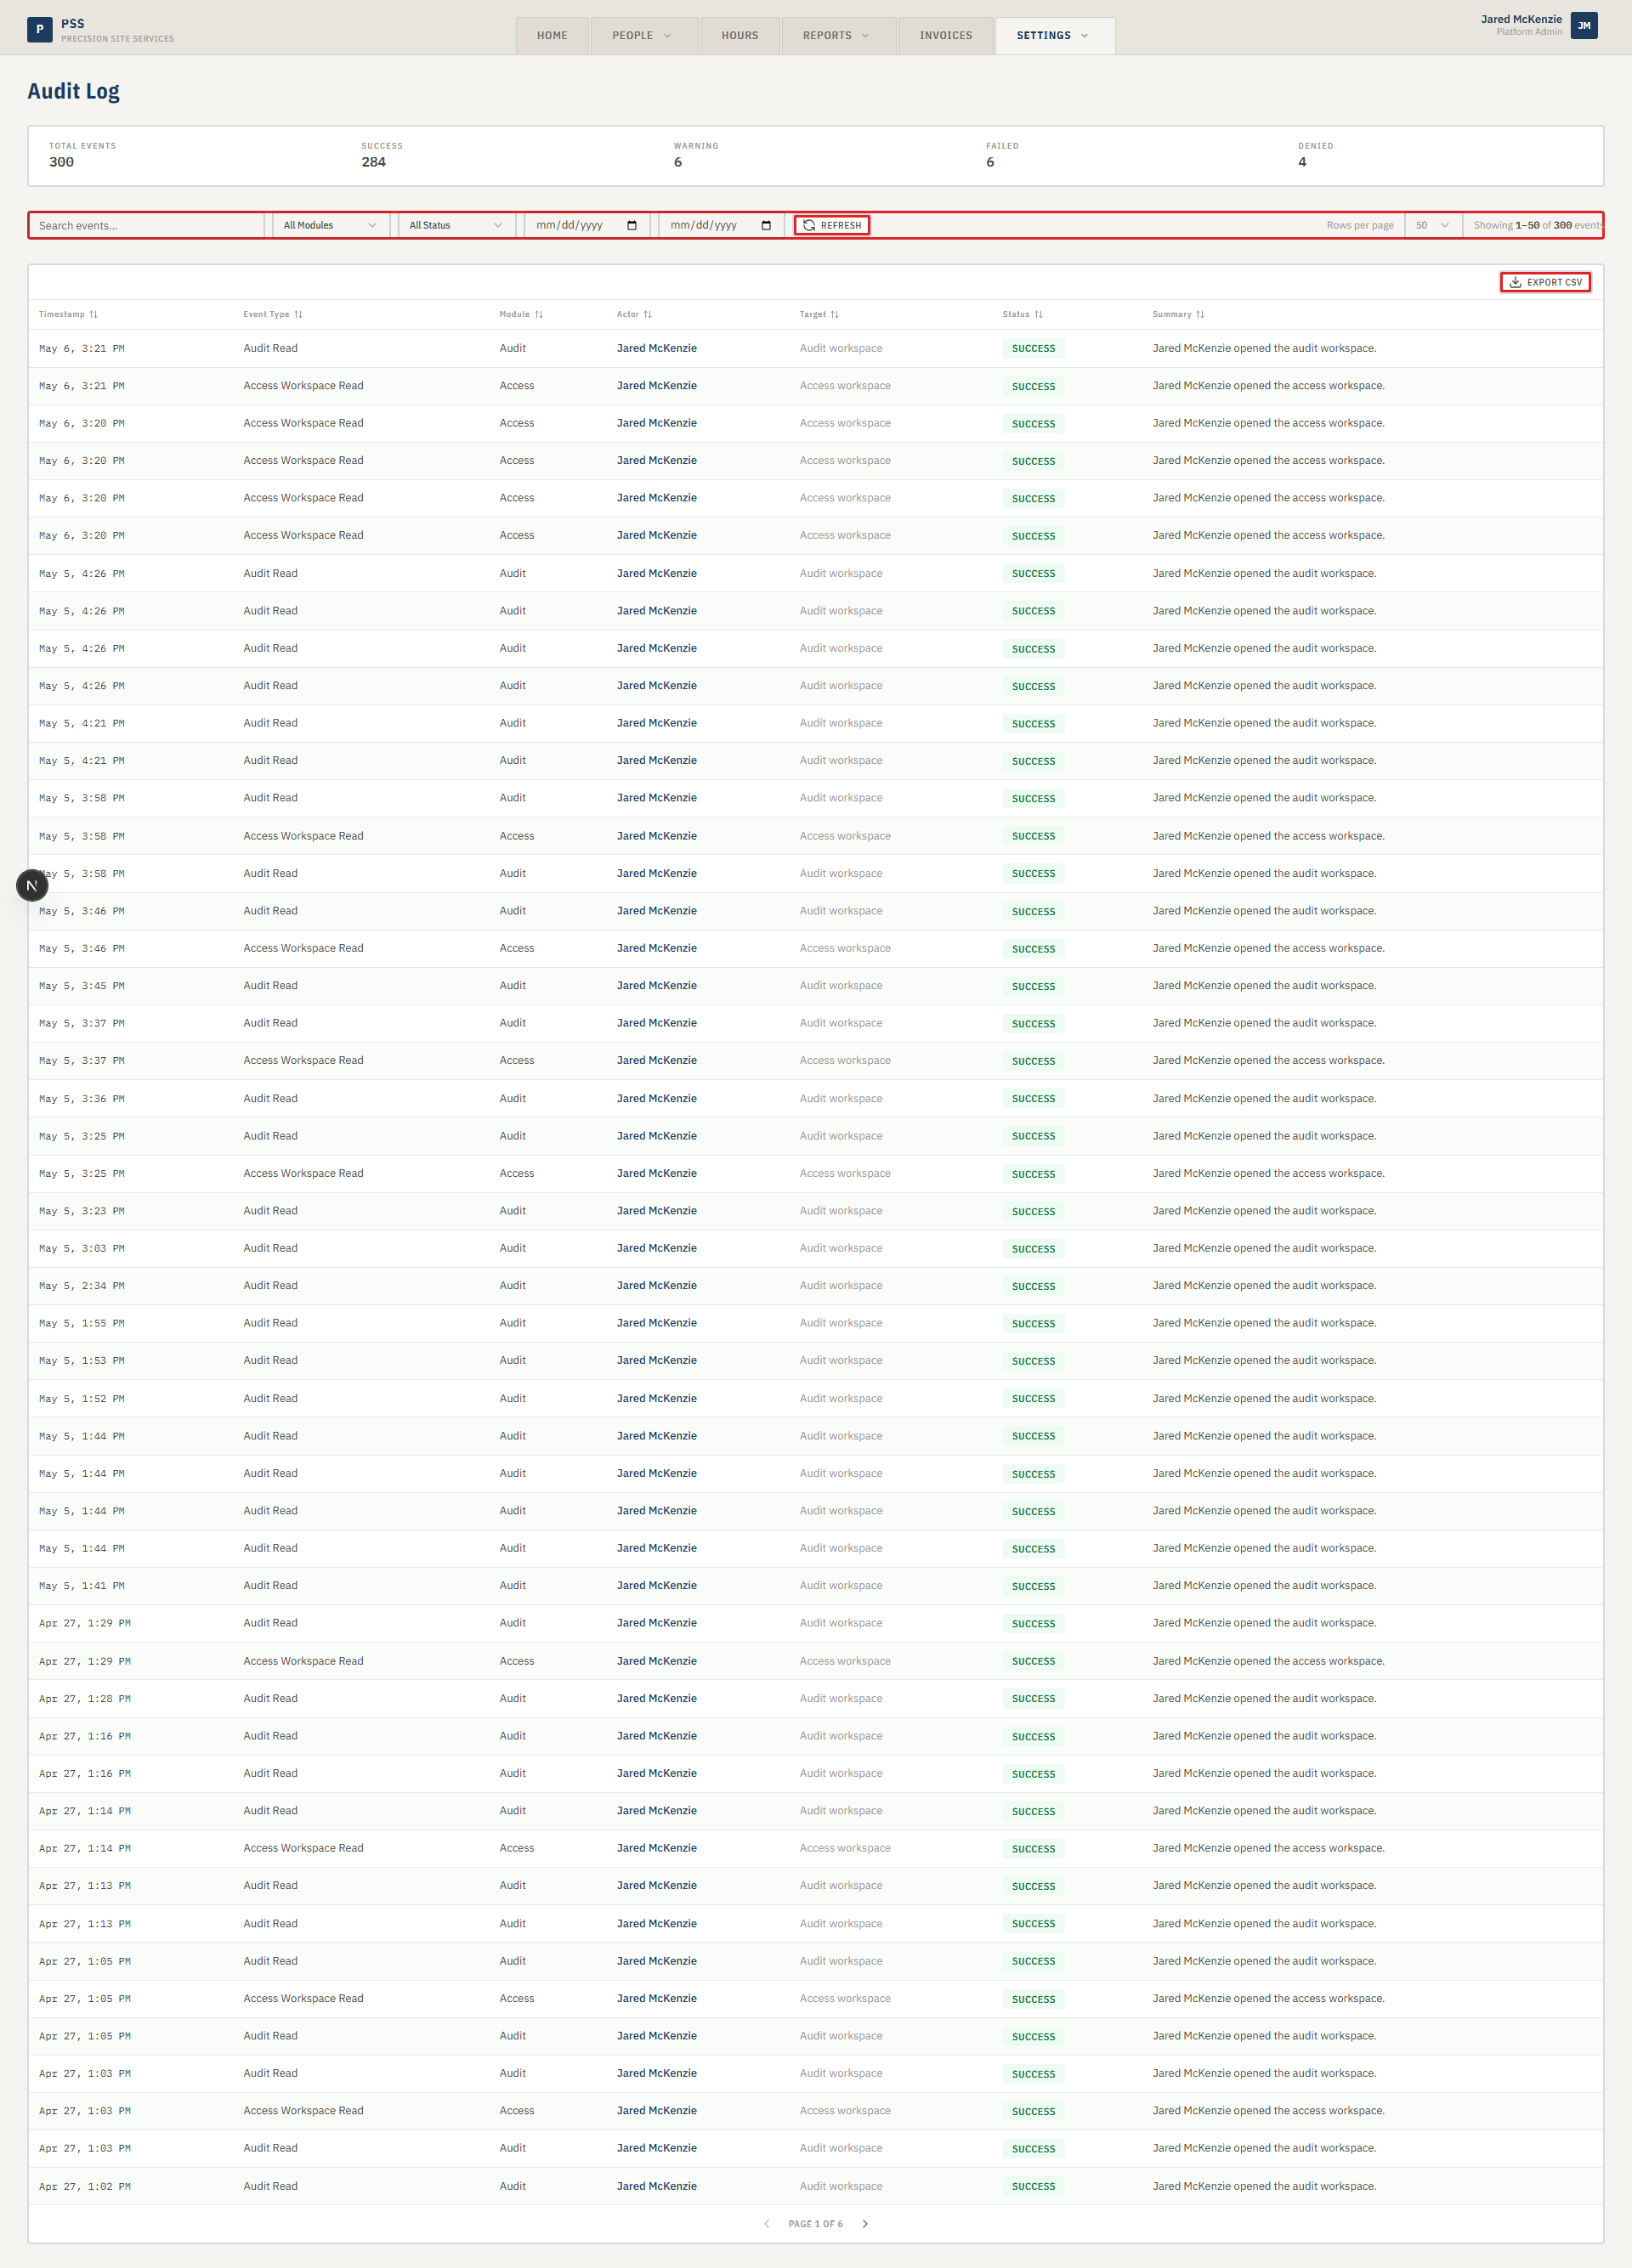
The Activity Log is a read-only record of every action taken in the app. Every time someone saves a change, runs a delivery, grants access, or triggers an automation, the system writes an entry here. Use it to investigate what happened on a specific date, confirm that a delivery went out, or find out who changed a setting.
The log cannot be edited or deleted. It is a permanent trail.
Each entry shows the timestamp, the type of event, which part of the app it came from, who performed the action, what record was affected, and whether the action succeeded or failed.
Steps
Reading the log
-
Click the Settings tab at the top of the screen.
-
Choose Activity Log from the dropdown.
-
The summary strip at the top shows counts for Total Events, Success, Warning, Failed, and Denied. Use these to get a quick sense of recent activity.
-
The main table lists events in reverse chronological order (newest first). Each row shows:
- Timestamp — the exact date and time the event happened.
- Event Type — what kind of action it was (for example, "Delivery Sent" or "User Updated").
- Module — which part of the app the action came from (for example, Automations, Access, Labor Report).
- Actor — the name of the person who performed the action.
- Target — the record that was affected (for example, a worker's name or a job number).
- Status — a colored badge: green for Success, yellow for Warning, red for Failed or Denied.
- Summary — a short plain-English description of what happened.
-
Click any row to expand it and see the full detail, including the Before and After state of the record at the time of the change.
Screenshot pendingExpanded audit log row showing before and after data panels.
This screenshot will be added in a future docs update once the underlying state is reproducible in dev.
Filtering the log
-
Use the search box at the top to find events by keyword — for example, a worker's name, a job number, or an action type.
-
Use the Module dropdown to filter by one part of the app (Automations, Access, Reports, etc.).
-
Use the Status dropdown to show only Failed events, only Denied events, or any other status.
-
Use the From and To date fields to limit the log to a specific date range.
-
Click Refresh to reload the log with your current filters applied. The log also reloads automatically when you change a filter.

-
Use the page-size control in the top right to show 25, 50, or 100 events per page.
Common mistakes
- Expecting the log to show field worker clock-ins. The Activity Log records actions by office staff in this app, not raw clock-in data from the field. For missing clock-ins, look in People → Active Sign-Ins.
- Filtering by date but forgetting to click Refresh. Date range changes do not auto-apply — click Refresh after setting the dates.
- Trying to edit or delete a log entry. The log is read-only by design. No one can modify it.
- Reading the Status column wrong. "Warning" does not always mean something went wrong — it can mean the action completed with a non-critical notice. Read the Summary column for context.
What to do if it goes wrong
- The log shows no events. Check that your date range is not too narrow. Clear the filters and refresh to see all recent events.
- A delivery you expected to see is not in the log. Filter by Module = Automations and Status = all, then widen the date range. If it still does not appear, the automation may not have run — check Settings → Automations → Execution History.
- You see a "Denied" event for your own account. A Denied status means the system blocked an action because your account lacked the required permission at the time. Check your role in Settings → User Access.
- You cannot see the Activity Log page. Your account needs the View Audit History permission. Ask an administrator to update your role.