Pulling a Labor Report
What this is for
The Labor Report is the office's single view of "who worked where, for how long, at what cost." Pull it when you need to see labor costs by company, by shift team, or by worker for a given pay week. It is the usual starting point for billing review, cost control, and project margin questions.
Before you start
- The pay week you want to review. The report is organized by week — use the week navigator to move between periods.
- Any filters you want to apply (employee name search, classification, overtime-only, or flagged entries) — optional, but filters make the report easier to read.
- Sign-in access with the View labor reports permission. If you cannot see the Hours tab, ask an admin.
- A rough sense of expected totals so you can sanity-check the result. A number that looks way off usually means you are on the wrong week.
Steps
1. Open the Labor Report
Click the Hours tab at the top of the page. The tab goes directly to the Labor Report — there is no sub-menu. The report loads showing the current pay week.
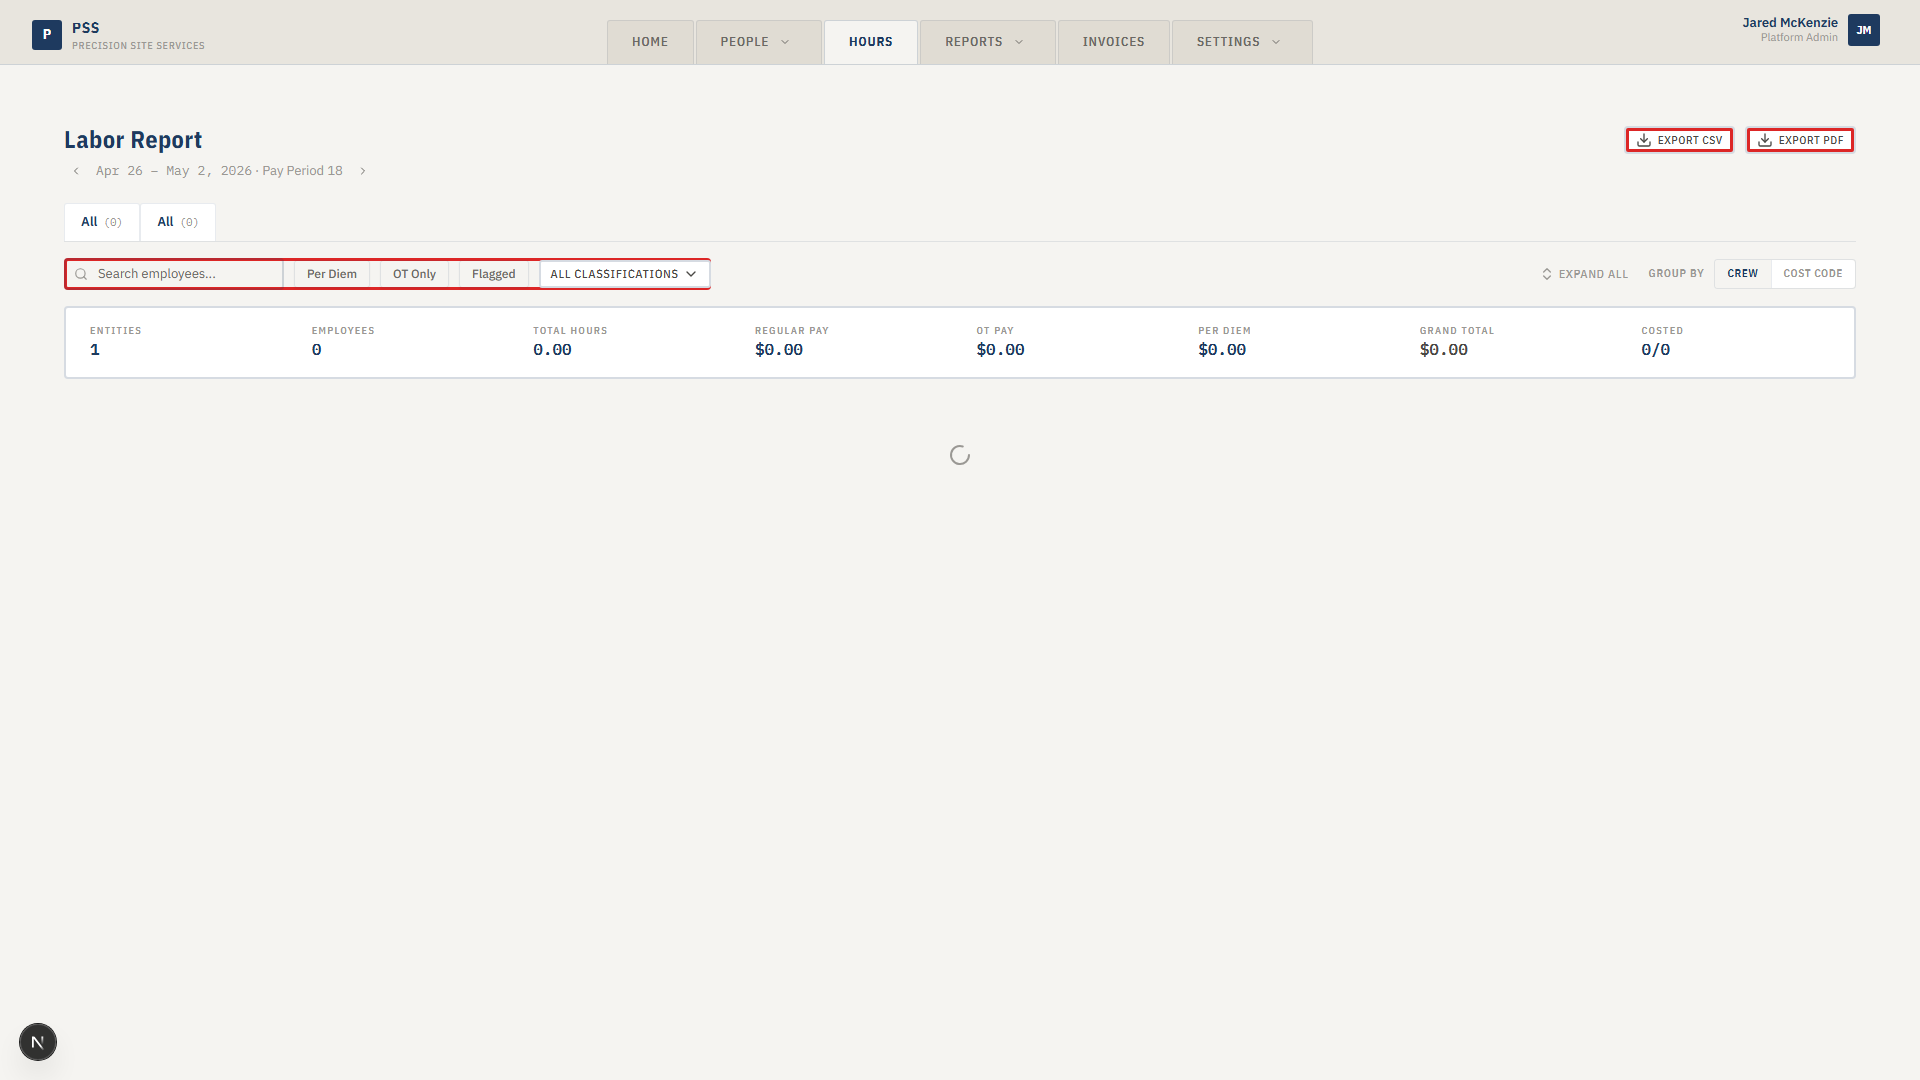
2. Navigate to the right week
Use the arrow buttons next to the period date at the top of the page to move between weeks. The label shows the date range and pay period number (for example, "Mar 31 – Apr 6 · Pay Period 14").
- Click the left arrow to go back one week.
- Click the right arrow to go forward one week.
The report reloads automatically when you move to a different week.
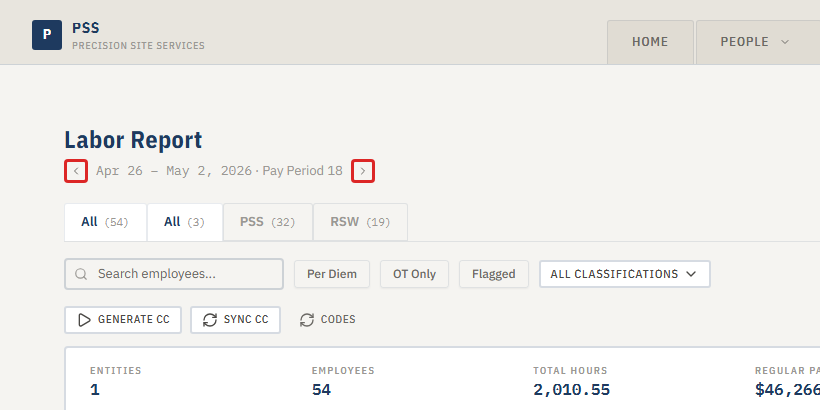
3. Pick a company tab
Above the filter bar, there is a row of tabs — one for All and one for each company that has hours in the selected week. Click a company tab to limit the report to that company's workers. Click All to see everyone.
The count in parentheses on each tab shows how many workers have hours for that company and week.
4. Apply filters
Use the filter bar below the company tabs to narrow the results further:
- Search box — type a worker's name to find them quickly
- Per Diem toggle — show only workers who earned a per-diem that week
- OT Only toggle — show only workers with overtime hours
- Flagged toggle — show only entries with a warning flag (missing clock-out, unusual hours, etc.)
- Classification dropdown — filter to a specific worker classification (for example, journeyman, apprentice)
Use the Group by toggle on the right side of the filter bar to switch the table layout between Crew (grouped by shift team) and Cost Code (grouped by work type).
![]()
5. Expand and review
The table groups workers by shift team (or cost code if you switched the Group by toggle). Click a crew group row to expand it and see the individual workers underneath. Click a worker row to expand their daily breakdown — each day shows gross hours, lunch deduction, payable hours, per-diem, and the jobs they worked.
Each worker row shows:
- Total hours (regular and overtime)
- Hourly rate
- Regular pay, OT pay, per-diem, and total pay
- Flags — red dot for a hard error, amber triangle for a warning
Expanded crew group showing worker rows and a daily breakdown.
This screenshot will be added in a future docs update once the underlying state is reproducible in dev.
The grand total row at the bottom of the table shows totals for all displayed entries. The summary strip above the table also shows high-level totals for the selected period and filters.
6. Export
Click either export button in the top-right corner of the page:
- Export CSV — downloads a flat file you can open in Excel. Every worker has one row per day plus a total row.
- Export PDF — downloads a printable version of the report.
There is also a Send for Approval button if your workflow requires submitting the report for sign-off before billing.
Common mistakes
- Looking at the wrong week. The report defaults to the current week. On Monday mornings most hours are not logged yet — use the left arrow to go back to last week for a complete picture.
- Forgetting to check the company tabs. If totals look too large, you may be looking at all companies at once. Click the specific company tab you need.
- Expecting real-time numbers. Hours only appear once workers have clocked out and, if corrections are involved, the corrections have been approved. Same-day numbers are incomplete.
- Pulling the report before cost codes are synced. If workers show under an "(unassigned)" cost code, the background sync hasn't finished. Click the Cost Code Sync panel above the table and trigger a sync, then refresh.
- Mixing up this report and the Weekly Report. The Weekly Report is the supervisor-verified view used for payroll sign-off. The Labor Report is the office master view used for billing and cost analysis. They cover the same hours but serve different purposes.
What to do if it goes wrong
- Table is empty. Check that you are on the right week. Also confirm the workers had active clock-in records for that period.
- A worker is missing. Confirm the worker has an hourly rate set on their profile. Without a rate, they may be filtered out of cost views. Also check the company tab — they may appear under a different company tab than expected.
- Hours show under "(unassigned)" cost code. Cost code assignment is an async background process. Open the Cost Code Sync panel above the table and run a sync. If the issue persists, contact an admin.
- Totals look wrong compared to the Weekly Report. The two reports are intentionally different — the Weekly Report shows only supervisor-verified hours, the Labor Report shows all logged hours. Compare the definitions before raising it as a discrepancy.
- Export fails or PDF is blank. Try narrowing to a single company tab before exporting. Large reports can time out. For bigger exports, use CSV rather than PDF.